Connect two Network Namespace via Virtual Ethernet (Veth) Device
Linux namespaces are a feature of the Linux kernel that allows for process isolation and resource virtualization. Namespaces are very important for developing lightweight virtualization and containerization technologies that allow many programs or services to run in isolation from one another as if they were on distinct systems. They allow the construction of isolated environments known as containers, which encapsulate an application and its dependencies while sharing the kernel of the underlying host system. There are several types of Linux namespaces. In this blog post, we will discuss only the Network namespace and will demonstrate how to establish connectivity between two network namespaces using a virtual Ethernet interface.
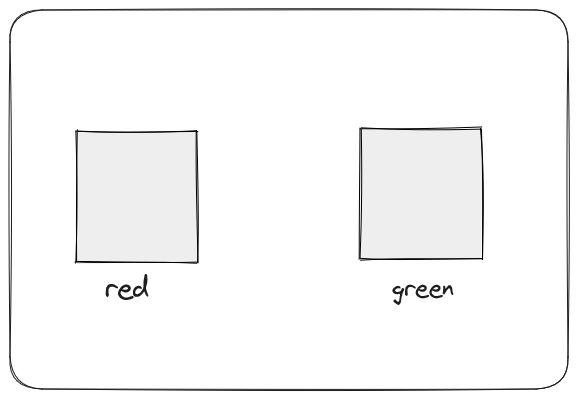
Network Namespace:
A network namespace is a feature of the Linux kernel that allows the operating system to isolate and separate network resources. It enables processes in different network namespaces to have separate network stacks, network interfaces, IP addresses, routing tables, and firewall rules.
Each network namespace has its own set of network resources, allowing programs running within it to operate in a virtualized network environment. Multiple applications or services can run on the same physical or virtual machine, each with its own network configuration, as if they were on distinct systems.
Network namespaces are frequently used in containerization technologies, where they play an important role in establishing isolated network environments for containers. When a container is built, a new network is generated.
Here are some important qualities and characteristics of network namespaces:
Network interfaces: Each network namespace may have its own set of virtual network interfaces, such as Ethernet and loopback interfaces. These interfaces are distinct from other namespace interfaces, and processes within a namespace can communicate with them as if they were the only ones on the system.
IP addressing: Network namespaces can be assigned their own IP addresses. Within a namespace, processes can have their own IP addresses, subnet masks, and default gateways. As a result, each namespace has its own independent network identity.
Routing: Each network namespace has its own routing table that governs how network traffic is routed. The routing table can be changed independently for each namespace, allowing for distinct routing configurations in different namespaces.
Firewalling: Using technologies such as iptables or nftables, network namespaces can have their own firewall rules. This provides fine-grained control over network traffic within a namespace, allowing administrators to impose namespace-specific security regulations.
Inter-namespace communication: Virtual network links known as virtual Ethernet (veth) pairs allow network namespaces to communicate with one another. These pairings serve as tunnels between distinct namespaces, allowing processes within those namespaces to communicate over the network.
Network namespaces are a strong network isolation mechanism that allows apps and services to operate in their own self-contained network contexts. They help to improve security, resource usage, and network management in containerized and virtualized settings.
Virtual Ethernet Device:
Let's say you have two computers. You're undoubtedly aware that you can connect those two computers using an ethernet wire without the use of a network switch. A similar arrangement is possible in your Linux server using VETH (Virtual Ethernet Devices) interfaces. You can create a virtual ethernet device that functions similarly to a physical ethernet network adapter. The virtual ethernet device will serve as a bridge between the network namespaces we will establish.
Prerequisites:
Basic knowledge of Linux networking and terminal commands.
Vagrant, Git and VirtualBox are installed on your machine.
Step 1: Install VirtualBox and Vagrant
Download and Install VirtualBox from the official website (https://www.virtualbox.org)
Download and Install Vagrant from the official website (https://www.vagrantup.com/)
Step 2: Initialize an Ubuntu Box in Vagrant
Open your git bash terminal
Create a new directory for your virtual environment
mkdir ubuntu-vmChange to the newly created directory
cd ubuntu-vmInitialize a new Vagrant Box with Ubuntu:
vagrant init ubuntu/bionic64
Step 3: Bring Up the Vagrant Box and SSH into It
Start the Vagrant box:
vagrant up. This process may take a few minutes.SSH into the running Vagrant box:
vagrant ssh. This will give you access to the Ubuntu environment within the virtual machine.
Step 4: Create two Network Namespaces and a Virtual Ethernet Interface
Inside the Vagrant box's terminal, run the following commands to create two network namespaces:
sudo ip netns add redsudo ip netns add greensudo ip netns
Create a virtual Ethernet interface:
sudo ip link add rveth type veth peer name gveth
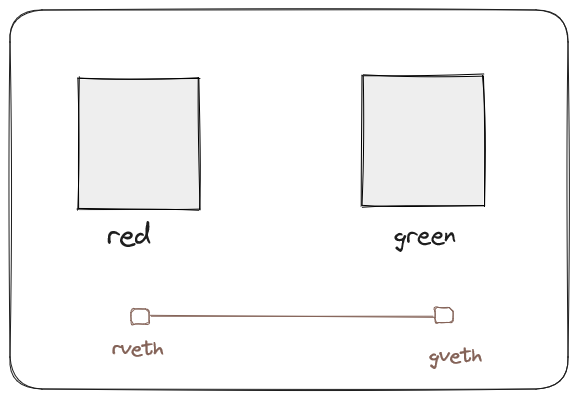
Connect gveth to green and rveth to red:
sudo ip link set rveth netns redsudo ip link set gveth netns green
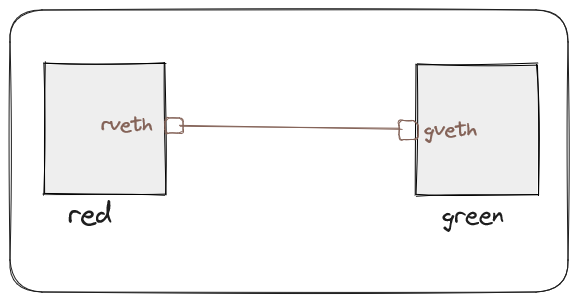
Bring up the loopback & virtual ethernet interface within the red and green namespaces:
sudo ip netns exec red ip link set dev lo upsudo ip netns exec red ip link set dev rveth upsudo ip netns exec green ip link set dev lo upsudo ip netns exec green ip link set dev gveth upAssign IP addresses to the interfaces:
sudo ip netns exec red ip addr add 10.10.0.1/32 dev rvethsudo ip netns exec green ip addr add 10.10.0.2/32 dev gveth

Step 5: Test Connectivity between the Namespaces
Add route table to assign ip into the corresponding interface. The kernel uses it to determine how to forward network packets to their destination.
sudo ip netns exec red ip route add 10.10.0.2 dev rveth
sudo ip netns exec green ip route add 10.10.0.1 dev gveth
Let's Test it:
sudo ip netns exec red ping 10.10.0.2 -c2
vagrant@ubuntu-bionic:~$ sudo ip netns exec red ping 10.10.0.2
PING 10.10.0.2 (10.10.0.2) 56(84) bytes of data.
64 bytes from 10.10.0.2: icmp_seq=1 ttl=64 time=0.047 ms
64 bytes from 10.10.0.2: icmp_seq=2 ttl=64 time=0.047 ms
sudo ip netns exec green ping 10.10.0.1 -c2
vagrant@ubuntu-bionic:~$ sudo ip netns exec green ping 10.10.0.1
PING 10.10.0.1 (10.10.0.1) 56(84) bytes of data.
64 bytes from 10.10.0.1: icmp_seq=1 ttl=64 time=0.036 ms
64 bytes from 10.10.0.1: icmp_seq=2 ttl=64 time=0.044 ms
We have successfully created two namespaces and connected them using a veth cable. We have also tested the connectivity by pinging between the namespaces.